

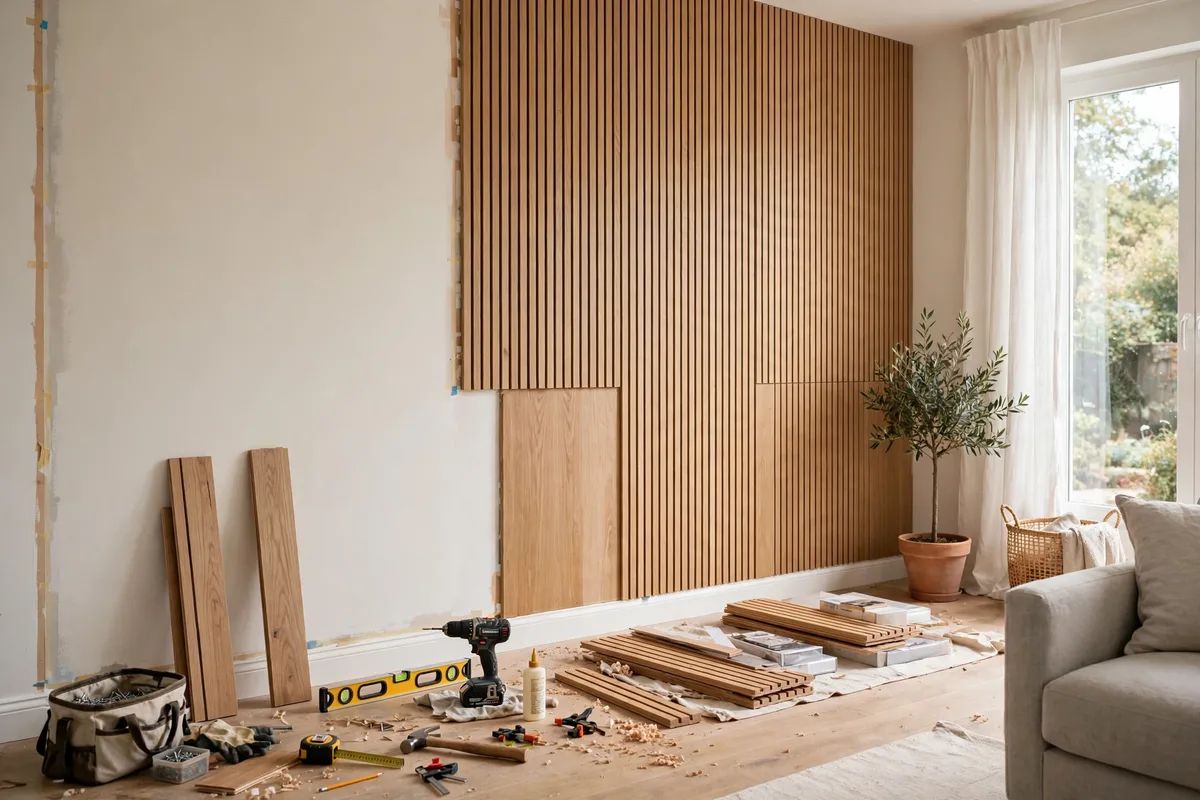
DIY wall panelling is one of the most satisfying upgrades you can make to a plain room. It adds depth, character and a sense of craftsmanship to flat walls, yet the materials are inexpensive and the skills involved are well within reach of a confident beginner. Whether you want classic shaker-style squares in a living room, tongue-and-groove boards in a hallway or simple slatted strips behind a bed, this guide walks through planning, fitting and finishing panelling on a realistic budget.
Why DIY Wall Panelling Works So Well
Panelling succeeds because it changes how light falls across a wall. The shadow lines created by raised frames or boards give even a small room a more considered, architectural feel. It is also forgiving: unlike wallpaper, which shows every bump beneath it, panelling can disguise uneven plaster, tired paintwork and minor surface damage. In period homes it restores a feature that may once have existed; in new builds it adds the character that plain plasterboard often lacks. Practical benefits matter too — panelling protects the lower half of busy hallways and dining rooms from scuffs, chair backs and muddy paws, and it can be repainted whenever you fancy a change.
Choosing Your Panelling Style
The three styles most DIYers choose are shaker panelling, board and batten, and slat panelling. Shaker style uses MDF strips arranged in rectangles and suits living rooms, bedrooms and hallways. Board and batten uses wider vertical boards with narrower battens over the joins, giving a more rustic, country feel. Slat panelling uses evenly spaced narrow strips and looks modern, working well as a feature wall behind a television or bed. Whichever you choose, keep the proportions in step with the room: large rectangles in a small room can look clumsy, while very small panels in a big room can feel busy. Sketch the wall to scale on paper first — ten minutes with a tape measure and a pencil saves real money later.
Tools and Materials You Will Need
Most DIY wall panelling projects need only basic tools: a tape measure, spirit level, pencil, mitre saw or fine-toothed hand saw, a drill-driver, a caulking gun and a sander or sanding block. Materials typically include MDF strips or moisture-resistant MDF boards (9mm or 12mm is a popular thickness), a strong grab adhesive, panel pins or a brad nailer, decorator’s caulk, wood filler and paint. MDF is the budget favourite because it is cheap, flat and easy to cut, but avoid standard MDF in bathrooms or anywhere with persistent damp — moisture-resistant board costs a little more and lasts far longer. If your project is part of a wider tidy-up, our guide to smart storage solutions pairs well with a panelling refresh for making a room work harder.
Planning, Measuring and Marking Out
Good panelling is mostly measuring. Start by deciding the finished height: full height for slat walls, around a third of the wall for classic wainscoting, or roughly dado height in hallways. Measure the wall width and divide it into equal sections, adjusting so panels sit symmetrically around doors, windows and sockets. Mark everything on the wall with a spirit level and pencil before you cut anything, and check your verticals more than once — walls and floors are rarely perfectly straight, so work from your marked lines rather than assuming the skirting or ceiling is level. Photograph the marked wall; if the layout looks balanced in a photo, it will look right when fitted.
Cutting and Fitting the Panels
Cut your strips or boards to length, dry-fit them against the wall, and label each piece on the back so the order is not lost. Apply grab adhesive in a zigzag along the back of each piece, press it firmly into place and pin it with brad nails or panel pins into the wall or battens to hold it while the adhesive cures. Work from one corner, checking levels as you go, and leave skirting boards in place unless they are damaged — panelling usually sits neatly on top of existing skirting for a clean finish. Around sockets and switches, switch off the power at the consumer unit before loosening faceplates, and never bury a junction you may need to reach again. Take your time: adhesive grabs quickly, but small adjustments in the first minute prevent crooked lines you will notice forever.
Filling, Sanding and Painting
The difference between amateur and professional-looking panelling is almost entirely in the finishing. Fill every nail hole and joint with wood filler, run a thin bead of decorator’s caulk along every edge where MDF meets wall, and sand everything smooth once dry. Wipe away dust with a tack cloth, then prime the MDF — unprimed MDF drinks paint and leaves a rough, patchy finish, especially on cut edges. Two topcoats of eggshell or satinwood, applied with a small roller and a brush for the recesses, give a durable finish that wipes clean. Bold colours look superb on panelling: deep greens, inky blues and warm neutrals all outperform pale shades at showing off the shadow lines you worked to create.
How Much Does DIY Wall Panelling Cost?
Costs depend on wall size and style, but DIY wall panelling is dramatically cheaper than paying a carpenter. MDF strips for a typical living room wall often come to a modest sum, with adhesive, filler, caulk and paint adding a smaller amount on top. As a rough guide, many people complete a single feature wall for well under the cost of one day of professional labour. Buying pre-cut panelling kits costs more per metre but saves cutting time and reduces waste; buying sheet MDF and ripping your own strips is cheapest if you have the tools and confidence. Keep receipts and a little spare paint for touch-ups — hallways in particular will thank you later.
Common Mistakes to Avoid
The classic errors are rushing the marking-out, skipping primer, and forgetting that walls are not square. Another is choosing a scale that fights the room: tiny panels in a long hallway look fussy, while oversized rectangles can overwhelm a box room. Avoid panelling over damp or mould — treat the cause first, or the new surface will fail. Finally, think about what the wall will hold afterwards: if you plan to hang artwork, a television or shelving on the panelled wall, note where the battens and fixings sit before you paint, a trick that also helps when planning bigger projects such as a home theatre design where screens and speakers need secure mounting.
Done patiently, DIY wall panelling delivers a transformation out of all proportion to its cost. Measure carefully, finish thoroughly, and a single weekend can give a tired room the tailored, finished feel of a far more expensive renovation.
